John leads us this week, and wants us to share three or four favourite photos before and after editing. It is amazing what we can do with everything from cropping to AI! Maybe editing is not my favourite thing, but in order to be happy with our photos, I think most of us do something – like increasing light or cropping.
John’s challenge was just in time for my biggest photo project ever – scanning and editing our old slides. Trying to bring back the feeling I and my husband had when we took the shot is not easy. I have started with Greenland from 1982. I guess there are software better for this task than what I have, but I will use the tools I have available. Which also tells that these photos are not favourites, but works in progress…
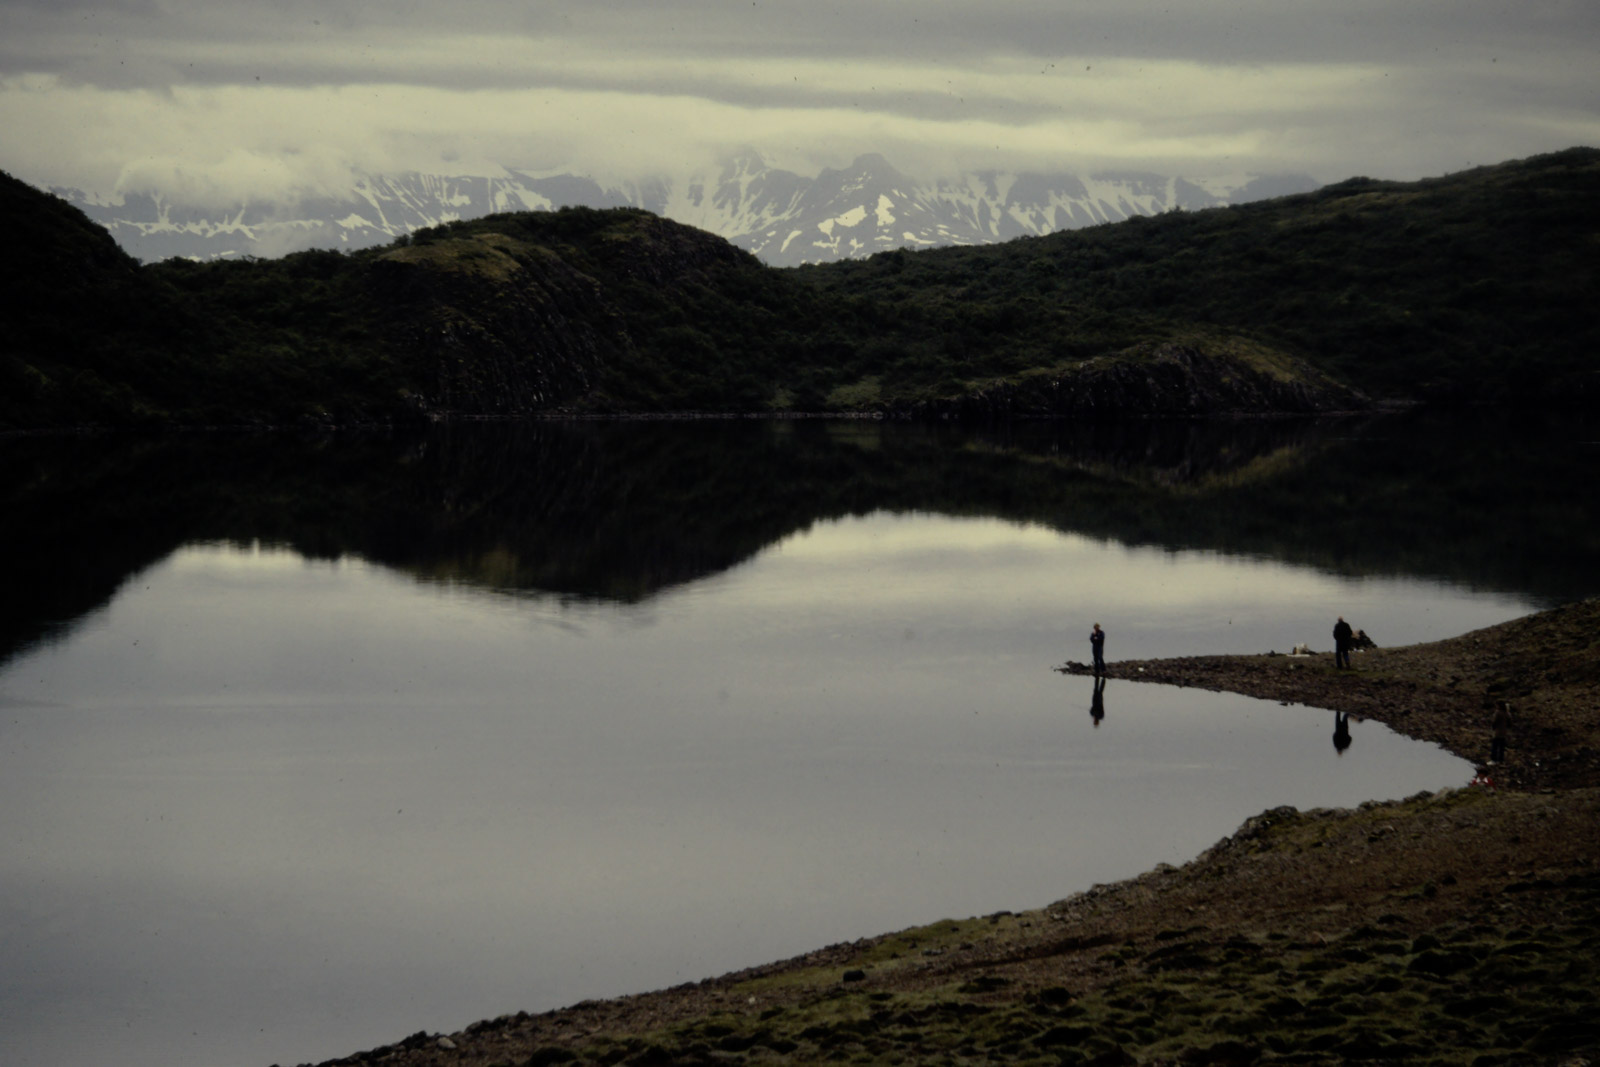

I always start in LR. Here I raised the exposure and added a mask for brightening of some shadows, then I reduced noise and haze. I always reduce highlight and raise the white. Then it is time to remove spots – and the slides have MANY spots. So, I will not repeat this sentence for the rest of them. Unfortunately the sky could not be altered smoothly, so I left it the way it was.


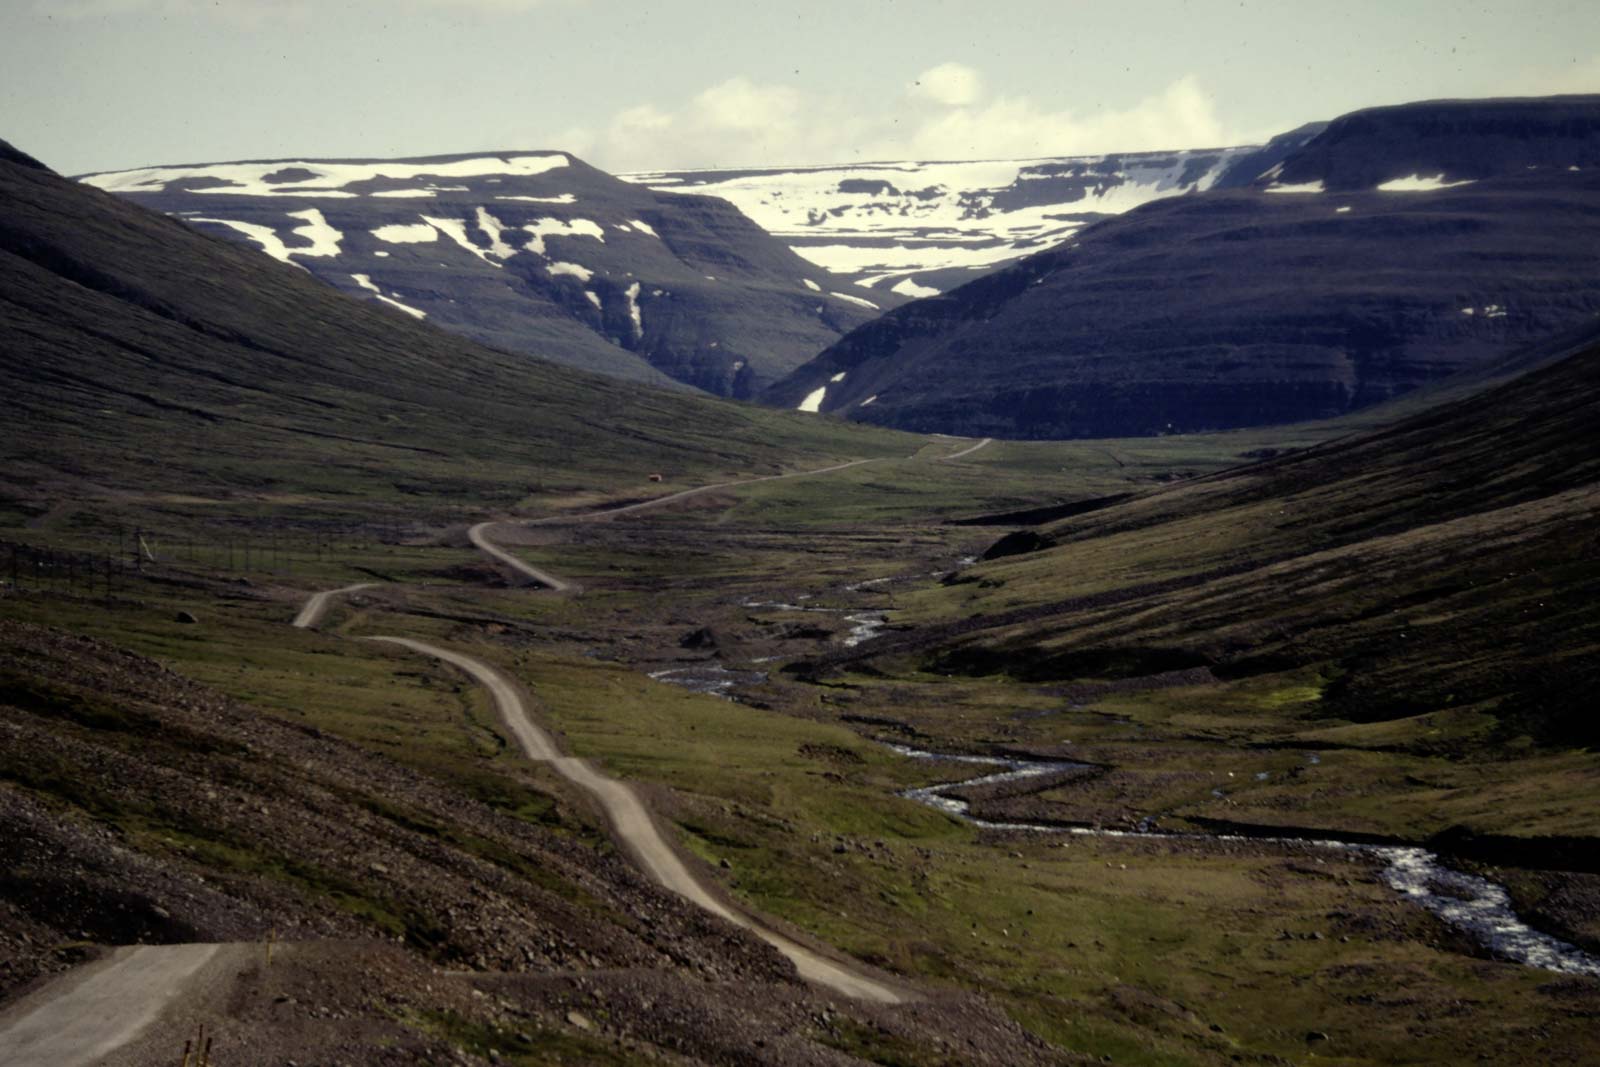
LR again, exposure up and shadows. Then masking to adjust the darkest parts, and after that, some noise reduction. I also raised the texture a bit for the beauty of the mountains. The sky was not a happy one, nor was the greenish snow on top, so I tried a new sky to match the ground colours, and reducing the saturation of green.
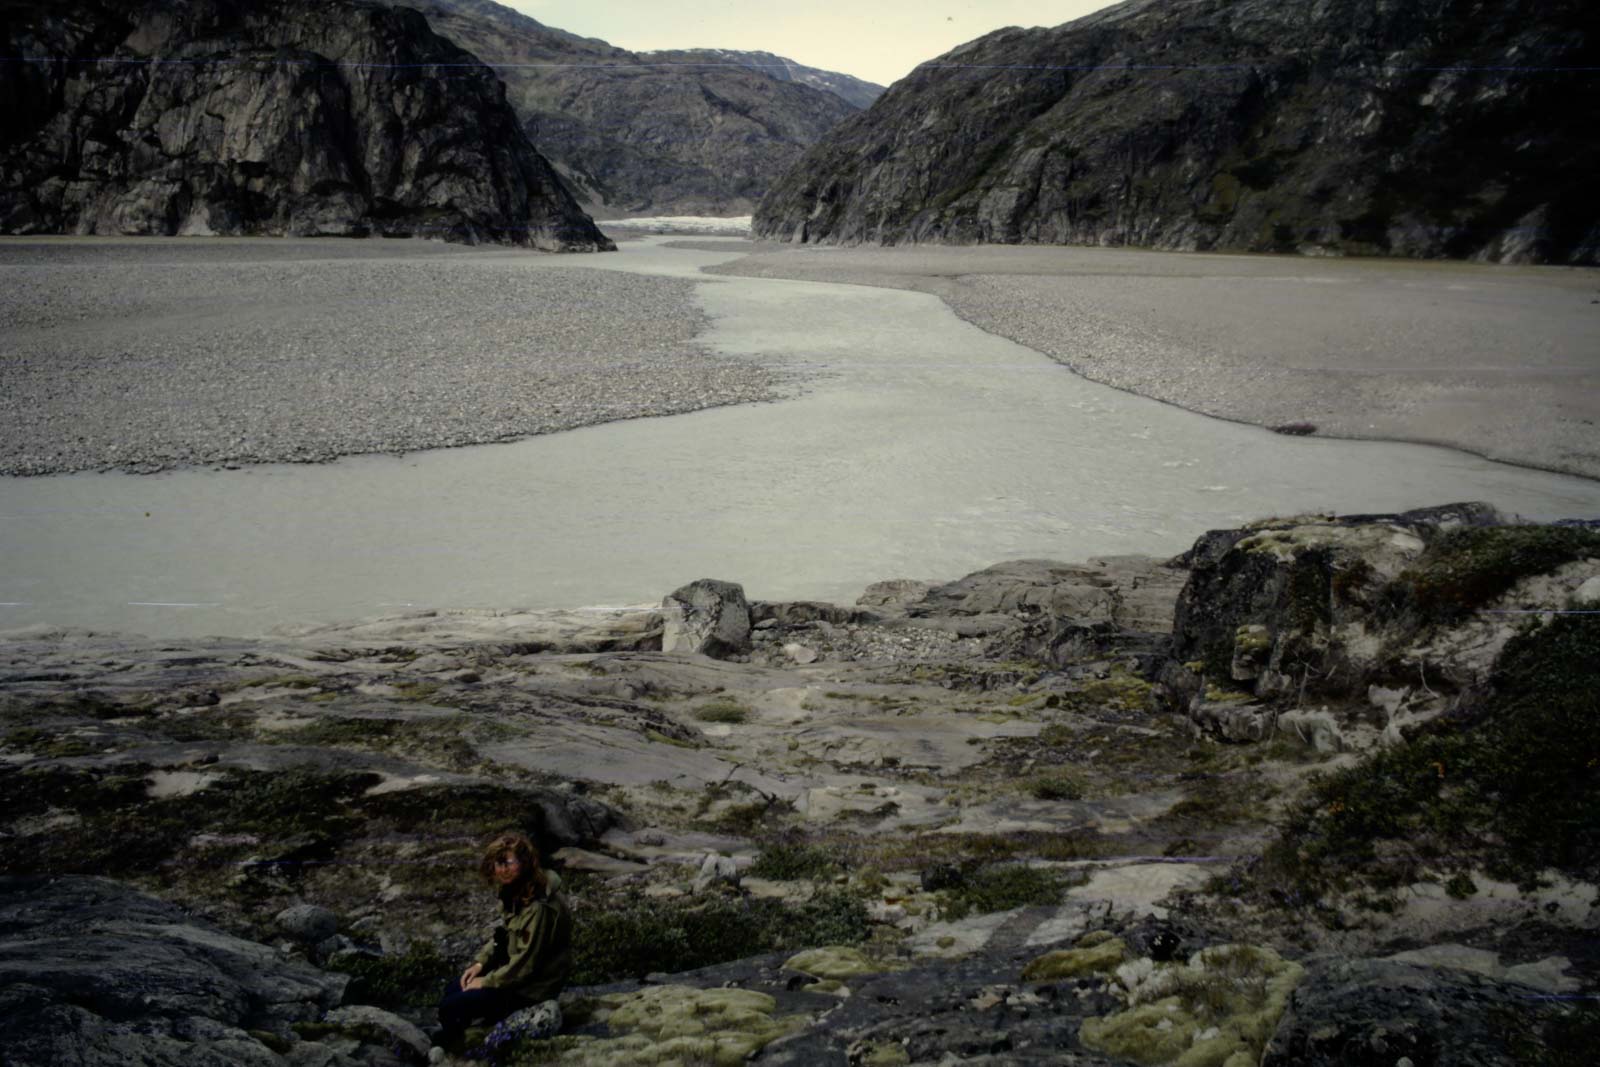

Some of the slides – quite many in fact, has got a thin blue line somewhere in the picture. Raising the exposure also revealed how hopeless the look of little me is here. So I removed myself as well. (That would be a useful possibility in real life too…) Photoshop is better than Lightroom to remove things you don’t want in the picture. Then back to LR and a reduction of noise and saturation (or sometimes an increased saturation) of yellow, green, blue and orange.
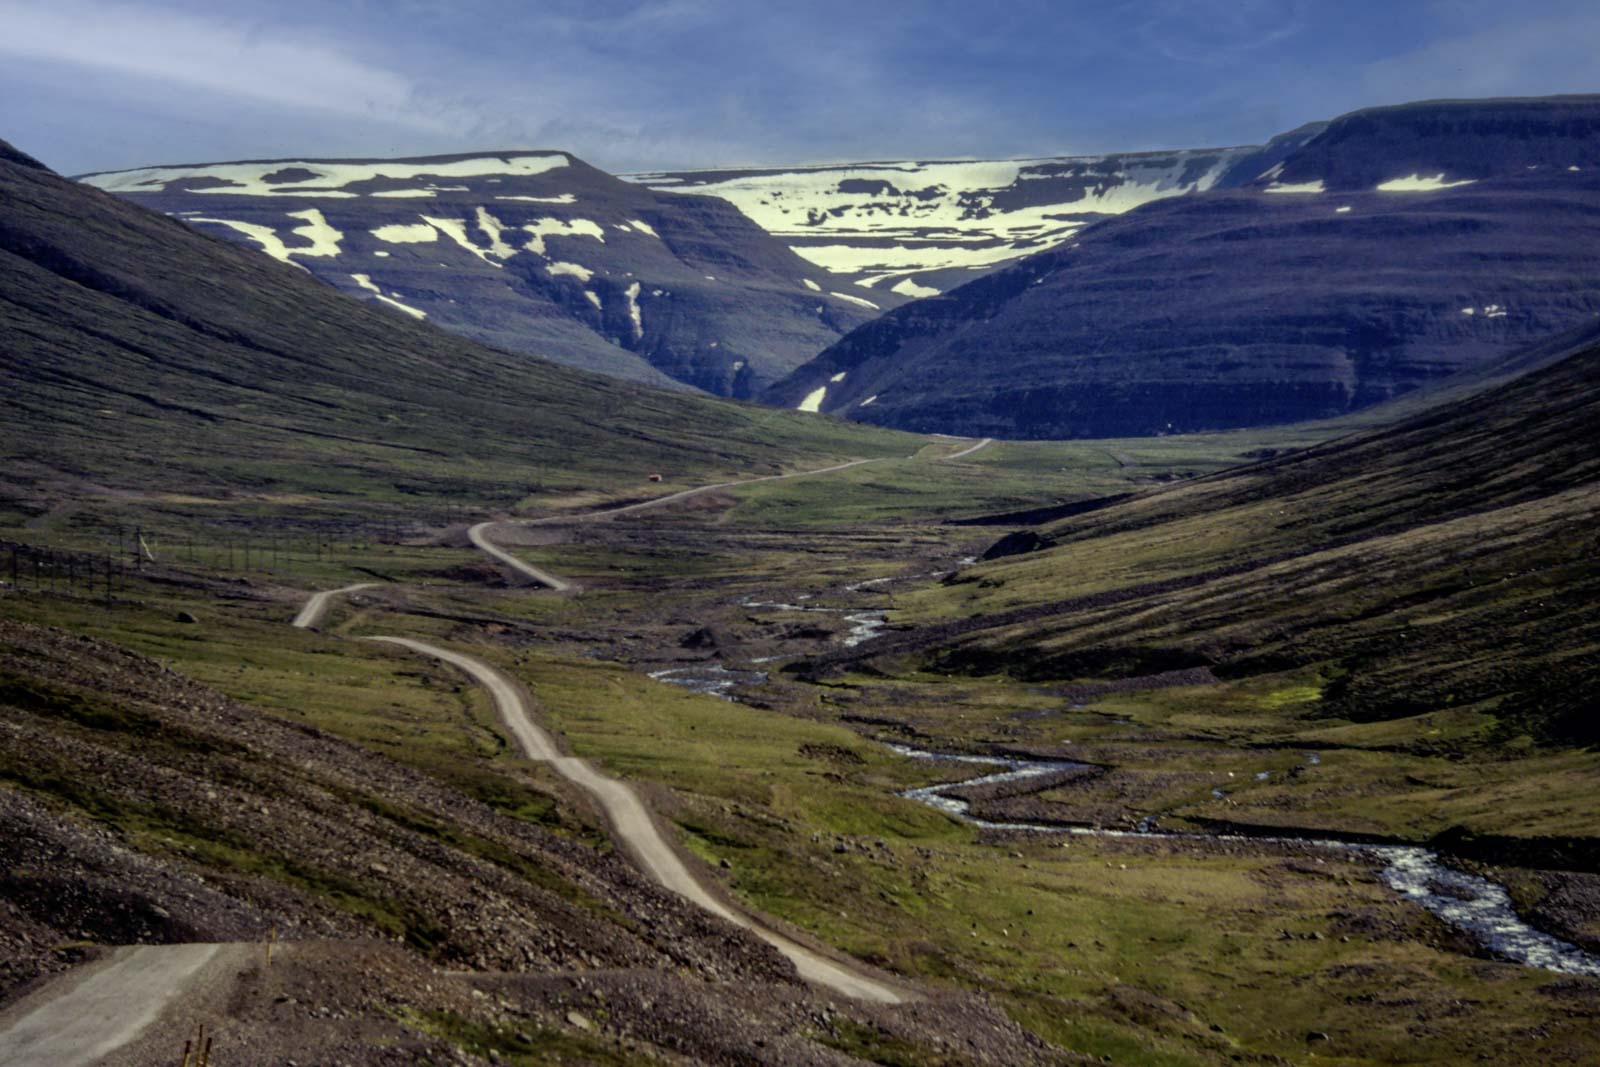
This looked a rather gloomy valley, but was one of the pictures I was quite happy with after editing. Maybe because there was no need to do much. Highlights and shadows adjusted, I reduced the haze a bit and calibration of the colour blue to deepen the overall colours. In PS I changed the sky, which I think lifted the whole landscape.
Finally – I would be grateful for any tips and tricks from anyone who has edited old slides!
John asks us to feature three or four images in our gallery that we tweaked for whatever reason as well as the original image straight out of the camera.
Last week, Sofia challenged us with Water in Motion – a delightful theme for all of us, with varied and creative answers! Next week, Donna of https://windkisses.com/ will host the challenge. Please visit her lovely site for inspiration, and you can find more information here if you want to join the fun.

Pingback: Lens-ArtistPC24-294-Before-After – WoollyMuses
Beautiful landscapes – I liked both original and edited versions
I am glad – thank you!
These are really interesting, when I first saw them I thought they were paintings, they have that quality to them. Great job Ann Christine.
Thank you so much, Leanne. I feel it is a very important job to try my best on. They are a part of my life – and much from those travels I have forgotten, but this is my chance to remember. I already have learned some tricks, and hopefully I will keep learning.
The editing brought out a lot of the character of the photos – nice work
Thank you, Nora – an endless work that has to be done little by little…
Ann-Christine, you did a really great job in recovering the beauty in your slides. Like you, I have also struggled with skies. It seems that is one area where old cameras generated bad images. The textures and colors you brought back are beautiful.
Thank you, Egidio – much to do with them, but fun too.
Well done Ann-Christine. I think you succeeded taking old slides and improving them in Lightroom.
Thank you, Anne – getting more confident as I work with them and hear positive comments.
😊
Interesting that you rescued so much detail from some of these.
Thank you – it is not easily done, some work out well and other don’t. Maybe they will not be much better as the software nowadays were not made to work with for example old kodachrome?
Great modifications, from barely viewable photos, to worthwhile, but still ‘natural’, examples. Well done.
Thank you so much, John! You made me a bit more confident!
Well as they say Ann-Christine – Good on you for giving it a go! Happily I’ve never done slide photography and somehow my parents’ images were all prints so I cannot begin to imagine the work involved. I love your commitment to preserving wonderful memories. All of the images were improved beautifully – not too far over the top so they remain realistic to the times when they were captured. Great job and an excellent choice for the challenge!
Thanks, Tina – I felt the challenge was made for me right now! I feel a bit more confident with your positive words, and will struggle along little by little.
Interesting that you used old slides. A great idea and the changes you made are profound. I know in going through photos from my parents, some feel like they should just be tossed, and yet, I know there is still life in them. You have proved that here. The clarity you brought to the images is fantastic. So well done.
Thank you, Donna! A whole new experience for me – but rewarding so far. I guess I will get a bit tired in the long run…but as you say – there might be life in them all if I try! This was a great challenge at the right moment for me. And I get more confident when I get positive feedback.
I’m completely out of my depth with this, having neither Lightroom nor Photoshop. As the others have said you’ve enhanced beauty in all of them and using the slider shows this off really well.
Thanks, Jo, I am struggling to make them get back the feeling!
They look good to me. I’ve only tried scanning slides once and I despaired 🫣🩵
What beautiful edits you made to your original photos. Well done my friend 😀
Thank you kindly, Cee! I am gaining more confidence from your words!
I’m currently salvaging my grandad’s slides from the 1950s and 60s and it’s a long process. Yours seem to be in good nick, the ones I’m working with are discoloured and mouldy 😦 I’m working mostly with Photoshop and finish them with LR.
I think you’re doing an excellent work, especially with the colours, they feel as they should for old slides. Isn’t that the magic of slides, those colours… Love your post and I wish you luck with this project, Ann-Christine.
Thank you, Sofia! I have already gained some more confidence from your words, but also think of the job for you with less healthy slides…I like the old colours too, but I find it difficult to get the pictures sharp enough. Dark and grainy. We’ll see for how long my patience will last…One step at a time…I have only started.
There’s only as much as you can do when it comes to sharpness as the originals have a lot less details than we are used to with digital. I love the grain, its personality 😀
Well done Ann-Christine. I have a bunch of old slides too, but haven’t even scanned them so not likely to be editing anytime soon!
Well, we waited for many years, but being retired now…I hoped to start editing them. We will see how much I am prepared to do!
Good luck!
Thank you, You too, whenever you decide to try!
You have done a wonderful job of editing those old slides. It’s quite a job but your results are worth it! My favorite is the valley.
Thank you, Beth! Your comment made me a bit more confident!
Well, you have a job-and-a-half on your hands here. But I think you’re doing a great job already. Gosh, you’ll be fed up by the time you finish.
Thank you, Margaret! And yes…unfortunately I think you are right. I have already decided to only do some of the travels…
Good plan. You can always come back later if you get a burst of energy.
You’ve done a great job with these slides. I too know the pain of getting rid of all those spots! And I like the way you’ve used the image slider so we can easily compare before and after. You asked about tips for editing slides. One bit of software I’ve found very useful lately, if you don’t mind investing a little, is Topaz AI, as its noise reduction and sharpening can improve a slide pretty quickly and effectively.
So glad you approved of my efforts here – and thank you for suggesting Topaz AI – I will look into it!
Your edits all brought the images to life from their prints. Working with scanned photos have a special challenge, and you have successfully brought them into the new age of digital photography.
Your last example is the most colorful, helped in part by the blue sky addition, but my favorite is the second image. The textures are amazing, and you’ve done a great job in putting the colors right.
Thank you, John, I am happy about that one too. But maybe I am beginning to see the magnitude of this work… So glad you are positive to my editing, I might feel more confident about it!
Fabulous comparisons 😀
Thank you, Brian – a difficult project, but I will persevere…
Amazing series
Thank you, Sheree!
Pleasure
These are lovely, just enough adjustments for the results to shine, you have brought the essence of the location to life. You may not enjoy the process but you do it well
Oh, thank you so much, Ritva – it is not an easy task, but now you made me more confident about it. This will be a long term project…but worth it.
Absolutely you will get great results
♥
Pingback: Lens-Artists Challenge #294 – Before and After - Fotofeed
Pingback: Lens-Artists Challenge #294 – Before and After - Bloggfeed